This guide provides an overview of our VPS services from the very beginning. Hopefully, it will be helpful to you!
Contents
- Creating a user account on the Tietokettu website
- VPS packages – basic information to help you decide
- Placing an order
- Basic usage instructions for VPS servers
Creating a user account on the Tietokettu Website

How to Manage a VPS Service?
Managing a VPS server is easy through your client area. Let’s quickly go over what we mean.
- First, log in to the client area.
- Go to https://tietokettu.net/ in your web browser.
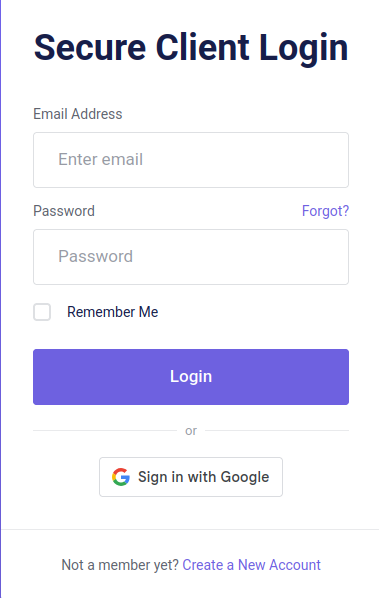
- In the top-right corner of the page, click on "Log in". Under the login section, select "New Customer".
- Fill in the required fields with your information.
- Accept the terms and conditions by checking the appropriate box.
- Click "Register".
- If the registration is successful, a confirmation email with a link will be sent to you. Click the link to complete the registration process.
VPS Packages – Basic Information to Help You Decide
Thinking about ordering a VPS server from Tietokettu? Here's how it works:
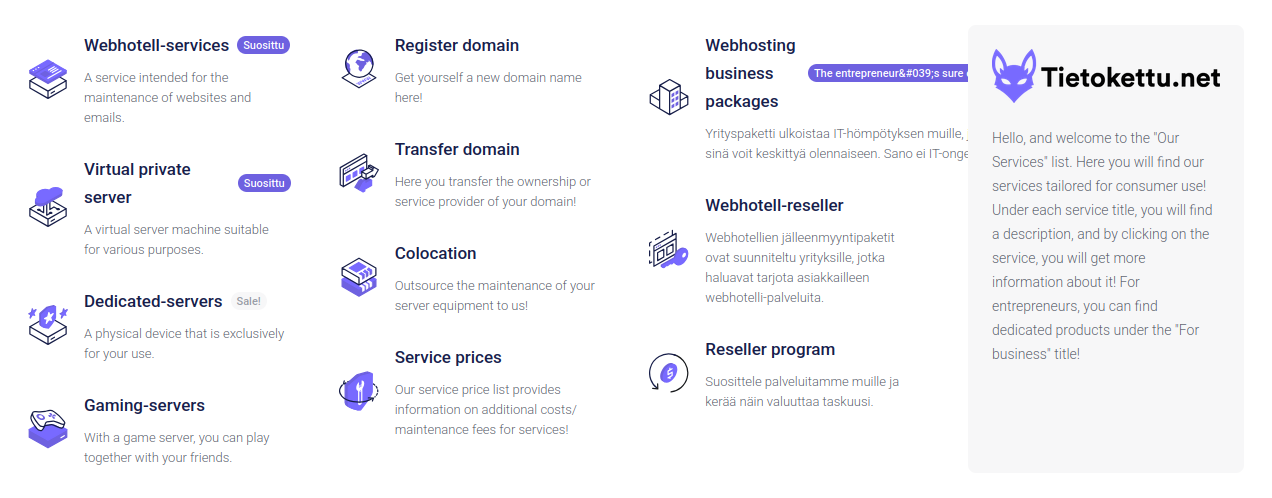
- First, navigate to https://tietokettu.net.
- Open the menu, locate the "Services" section, and select "VPS Servers".
In the VPS Servers section, you’ll see various options. If you're unsure which package suits your needs, our customer service can assist. Here’s a quick guide to our packages:
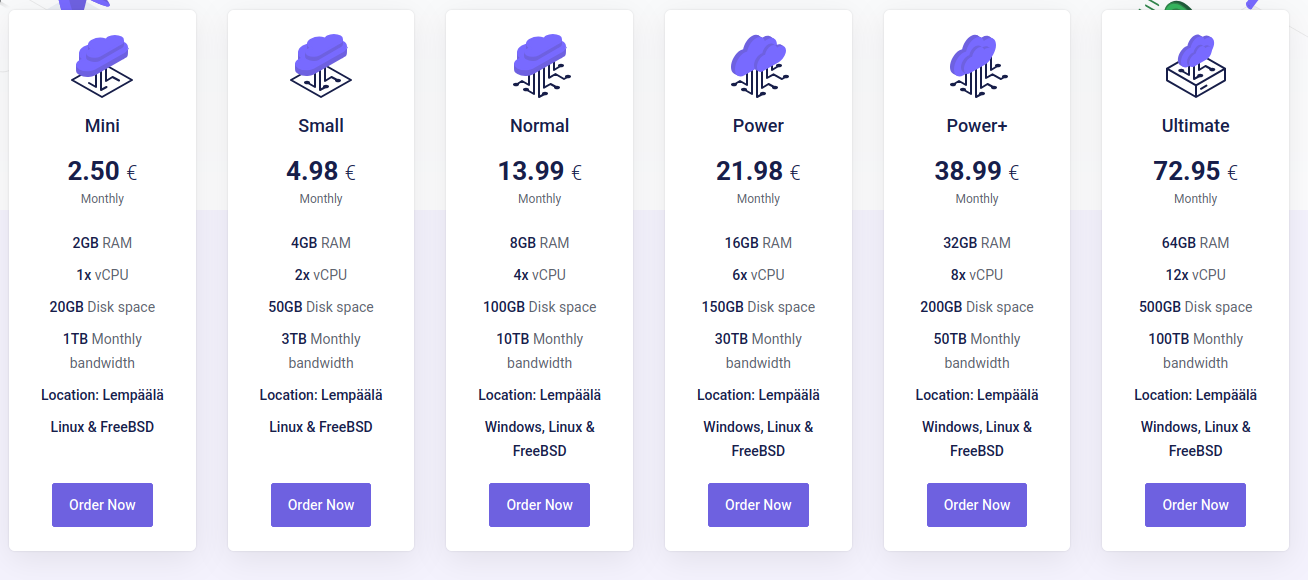
-Mini Package (€2.50): A very affordable option, suitable for a mail server or a lightweight website. Not recommended for heavier workloads.
2Gb RAM / 1x vCPU / 20 Gb disk space / 1Tb monthly bandwidth
-Small (€4.98): A great choice for hosting a small game server or other moderate web services. Suitable for Windows-based server systems, like website hosting.
4Gb RAM / 2x vCPU / 50 Gb disk space / 3Tb monthly bandwidth
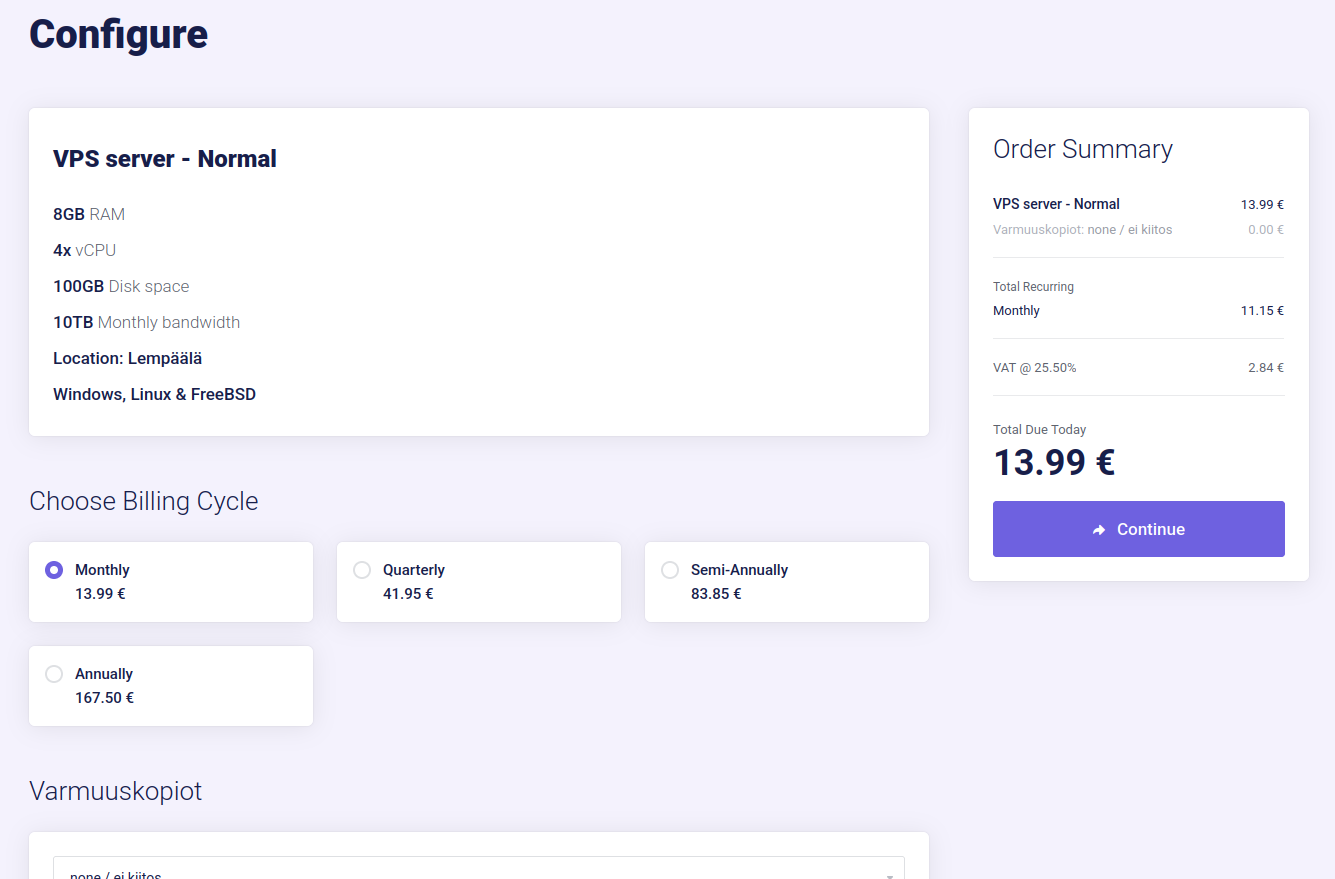
-Standard (€13.99): Well-suited for public game servers or larger system operations.
8Gb RAM / 4x vCPU / 100 Gb disk space / 10Tb monthly bandwidth
-Power (€21.98): Ideal for demanding needs where the standard package isn't sufficient. It offers ample power and storage.
16Gb RAM / 6x vCPU / 150 Gb disk space / 30Tb monthly bandwidth
-Power+ (€38.99): Flexible for running multiple systems simultaneously.
32Gb RAM / 8x vCPU / 200 Gb disk space / 50Tb monthly bandwidth
-Ultimate (€72.95): Planning to run a massive system? This package has you covered.
64Gb RAM / 12x vCPU / 400 Gb disk space / 100 Tb monthly bandwidth
Placing an Order
First, select a billing cycle. Remember that longer periods are more cost-effective over time! The hostname is used within internal networks, and you can enter a suitable name for it.
The root password, i.e., the administrator password, should be noted down for safekeeping.
Backups are not mandatory, but you can take them if you want extra security.
There are many options for the operating system. If you are unsure, it’s a good idea to ask for help, but I can provide some basic guidance.
Centos: good for running network systems or hosting websites.
Debian: excellent for managing Linux systems.
Ubuntu: user-friendly and the easiest for beginners to learn.
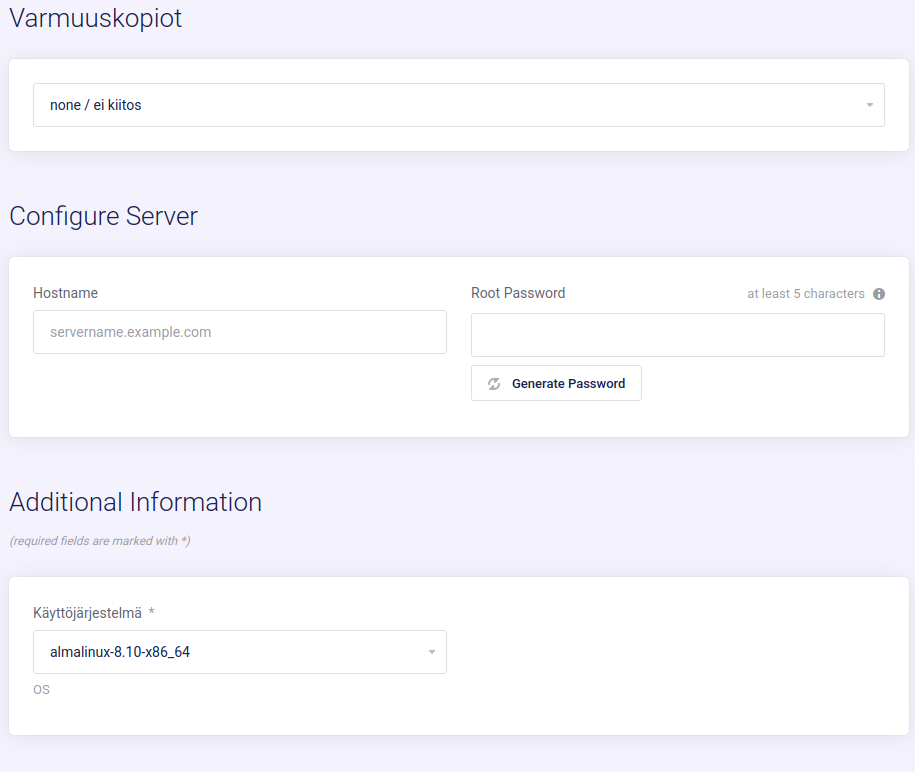
Complete your order, and you’re good to go!
Basic Usage Instructions for VPS Servers
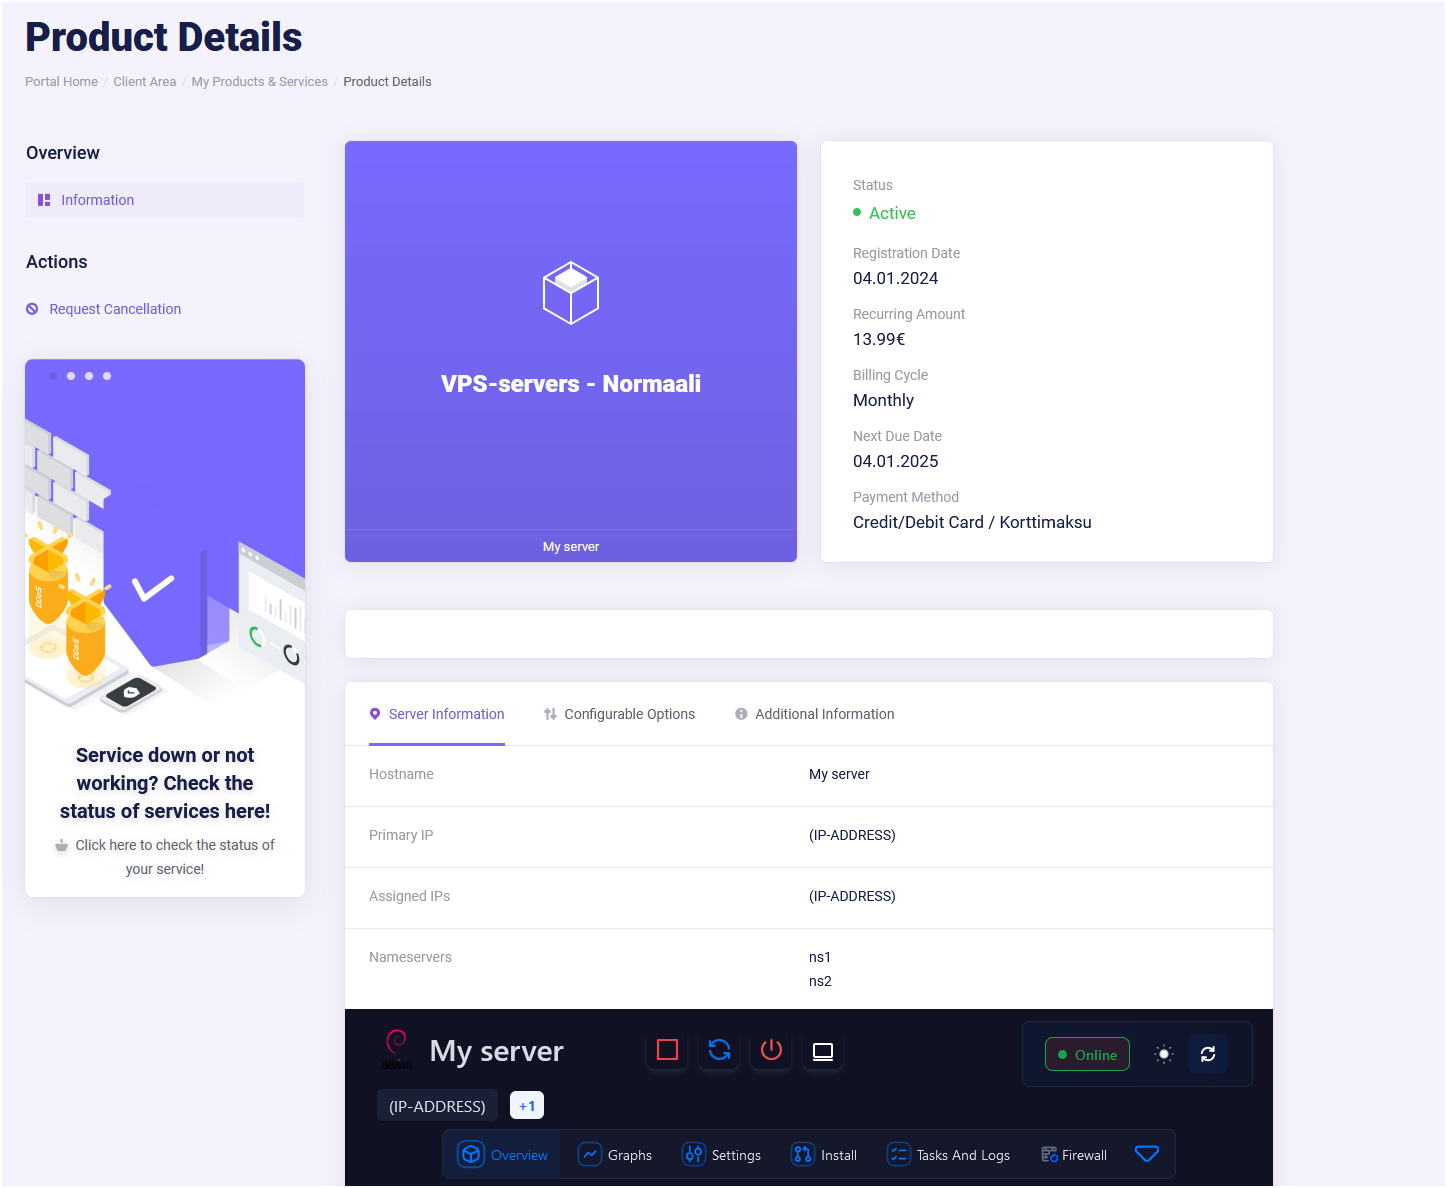
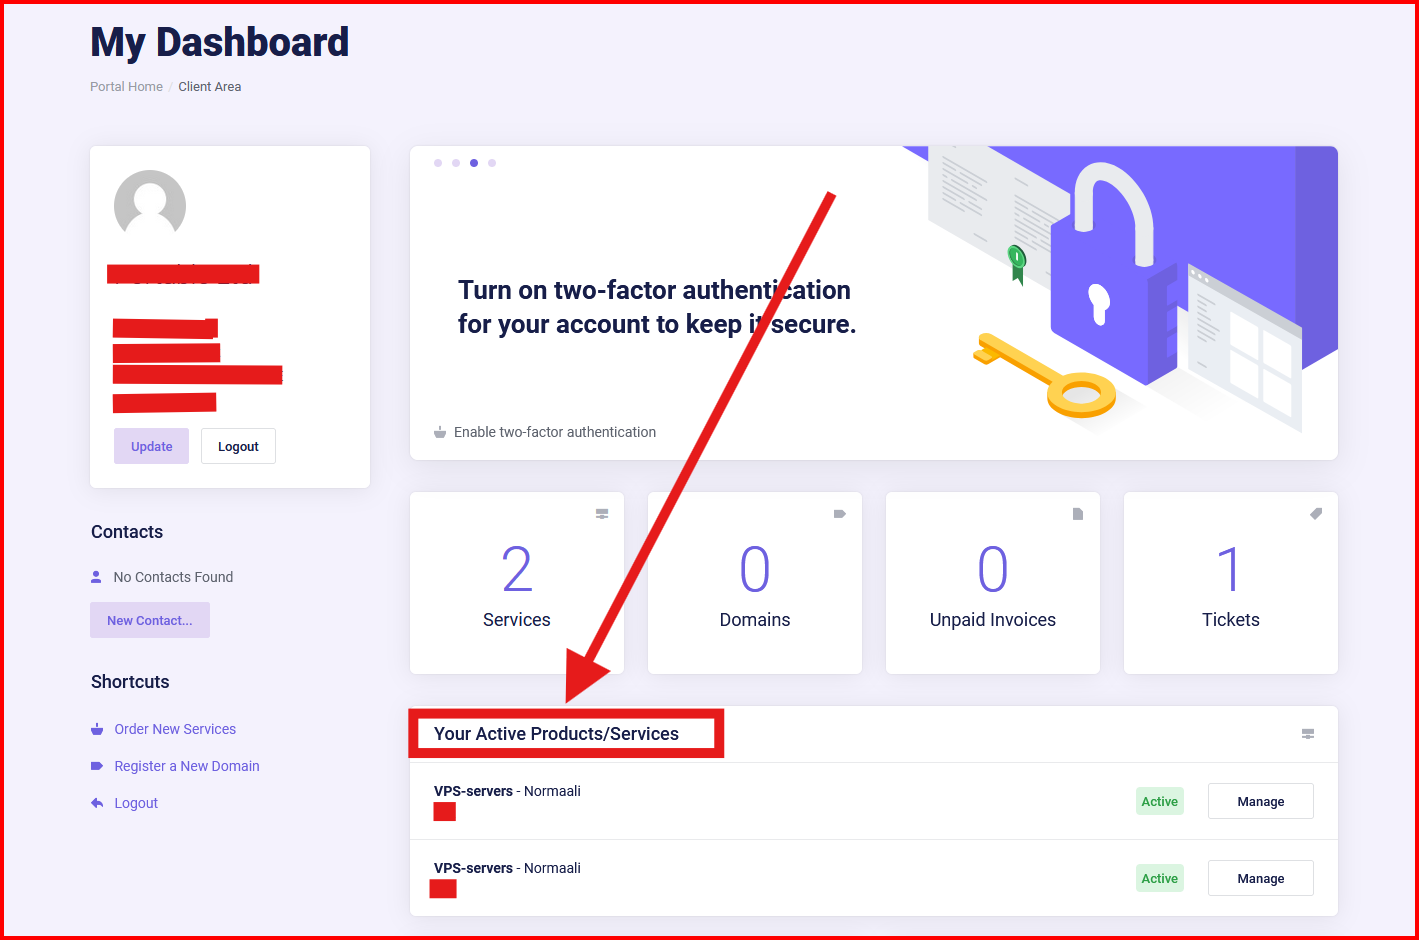
Once your order is processed, you can log in to your account on the homepage. After logging in, go to "Management" -> "Customer Pages".
Here, you'll find details like "Products and Services." Click on it to view your purchased services. Open your server to access the "Product Details" page, where you can see its status (active or pending). If pending, wait for a moment while we activate your server.
Scroll down to find the information panel, where you can:
- View server location
- Check IP address
- Restart or stop the server
- Access SSH
- Use VNC (Here, you’ll find VNC IP and port information for your reference)
connecting to windows server via vnc
How to control VPS-server?
VPS-Server control It can be done easily from your customer area. Let’s quickly go through what we mean.
- first log in to customer area

- Next, we look for the "Active Services" section in the client area.
- Next, click the "Manage" button for the desired VPS service
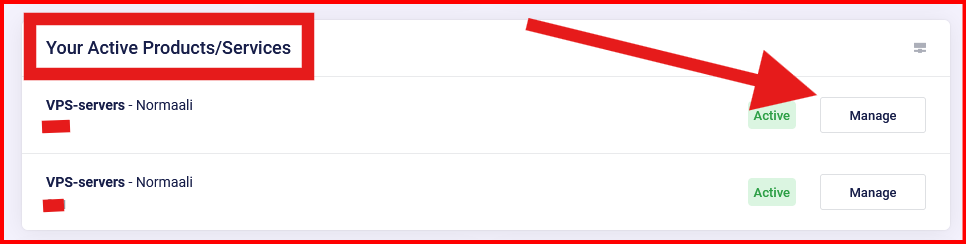
- Next, we arrive at the "Management" view. Here, you can handle everything needed for your service